

| PHOTOGRAPHS TAKEN BEFORE AND DURING INSTALLATION: |
 |
We gathered cords, cleaned mice, tested the hub, and ran final tests on the computers. (12-6-06) |
| We cleaned and packed the supplies in boxes. |  |
 |
Everything's ready to go. (Nine computers, two boxes with keyboards, mice, and cords, hub, posters, software discs.) |
| The computer lab's finished. Shot taken from door. (12-7-06) |  |
 |
Check to make sure the computers are running properly. Check cords, cables, etc. |
| Shot taken from the corner of the room. (Where the bookcases are.) |  |
 |
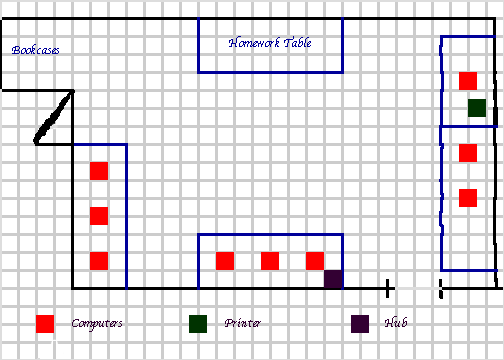
A view of the desk and printer. This is on the wall by the door. (See diagram on the journal for details.) We put three posters on this wall: E-mail, English, and Math/Science. |
| View of the homework table we set up for them. Shot taken from the corner with the desk. |  |
 |
We put the bookcases in the small corner. It made the space more useable. |
| Trying to work out an IP address problem. |  |
 |
A final shot of the room. |
| Since software was difficult to find, especially for high school students, we made posters for the lab with websites on a variety of subjects. This one was for e-mail. |  |
 |
The English poster. Resources help students learn grammar and check definitions. |
| These resources help students with biology, geology, mathematics, etc. |  |
 |
A history poster that helps students learn how to write a paper, do research, and find primary sources. |
| A variety of websites with public domain literature. (Some have works in their original languages.) |  |
